Named Entity Recognition with Molecular Biology Text Data
In this tutorial we will show you how to train and operationalize a machine learning model that performs named entity recognition on molecular biology text corpuses in less than an hour with declarative ML. You can follow along with this free notebook including sample code and data.
Introduction to Named Entity Recognition
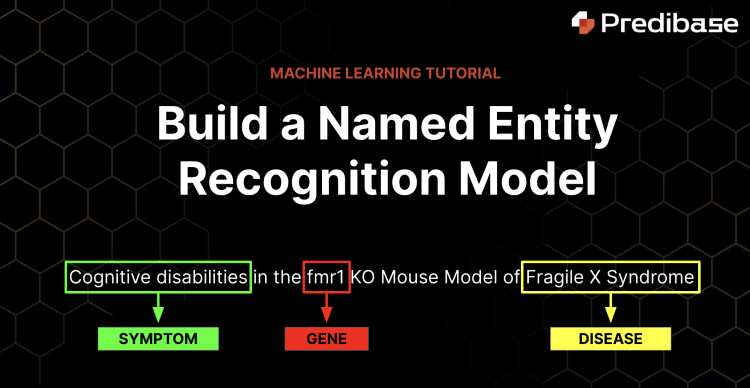
Named Entity Recognition (NER) is an essential task in Natural Language Processing (NLP) that involves using machine learning to identify and classify text entities into a set of categories such as locations (e.g. Canada, Tunisia), names (e.g. Albert Einstein), dates or any category for that matter. NER can be used in many applications—as an example NER is used by customer support teams to route complaints to specific teams or by HR departments to identify applicants with requisite skills.
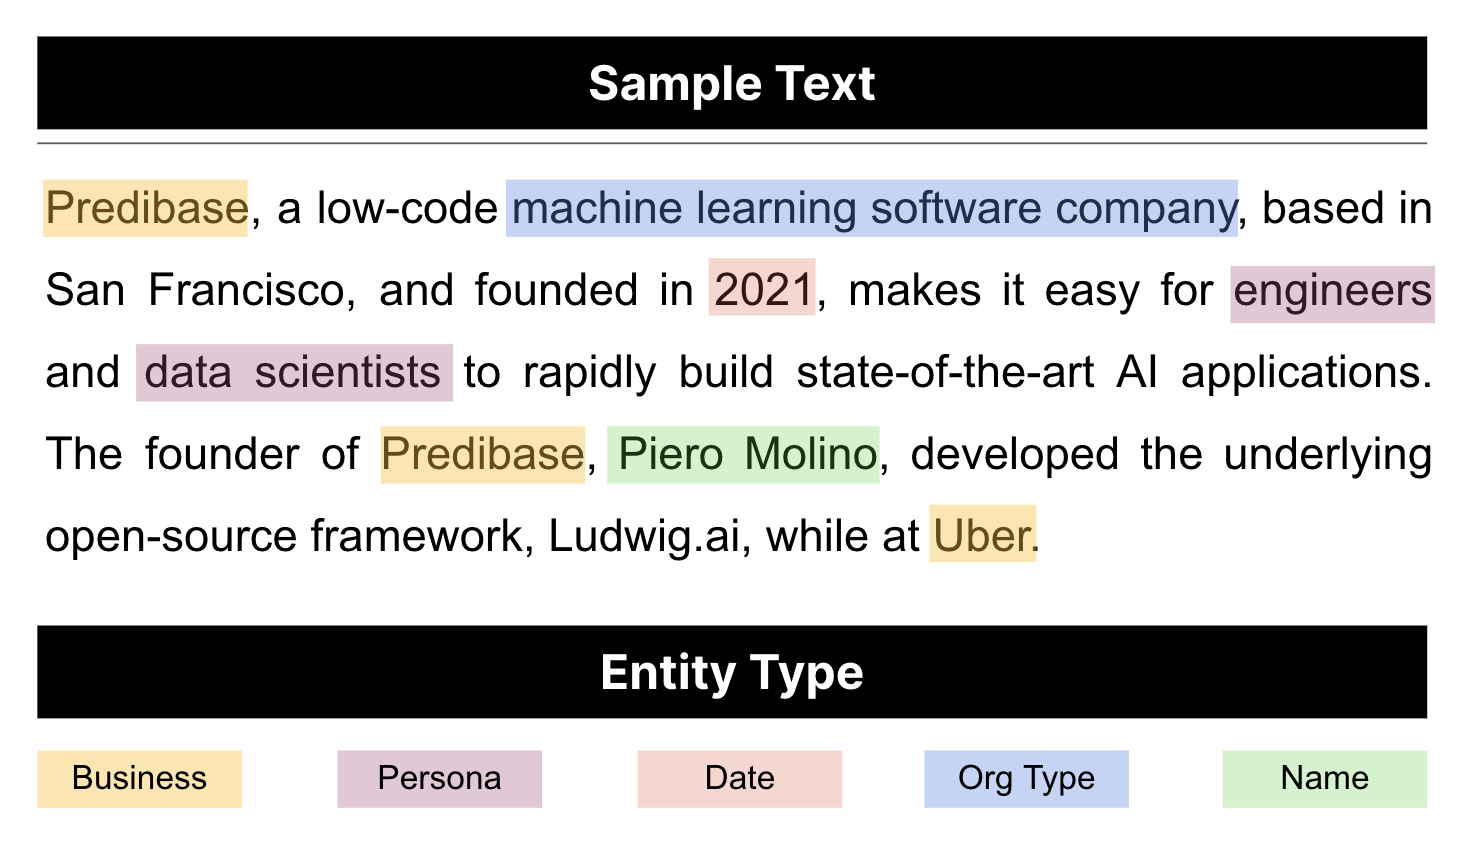
Example of named entity recognition model output.
One specific example where NER is particularly important in the field of molecular biology, where large amounts of data are generated from experiments and literature, and accurate identification of named entities (e.g., proteins, genes, diseases, etc.), is critical for organizing research and understanding biological systems. In this blog post, we will discuss how to build a Named Entity Recognition model for molecular biology in less than an hour with a simple configuration file using Predibase, the low code declarative machine learning platform.
Data Preparation: BioNLP/JNLPBA Molecular Biology Dataset
Before we can start building our NER model, we need to prepare our data. For this tutorial, we will use the BioNLP/JNLPBA Shared Task 2004 dataset which is composed of roughly 18,000 text snippets containing molecular biology terminology. The dataset comes in IOB format, so it contains a tag for every single word in each text snippet.
After downloading the dataset, we need to do a little bit of preprocessing to get the data into a tabular format for Predibase. The following function takes the IOB data and processes it into the structure we are looking for.
def process_iob_data(binary_string):
    """Function to process IOB data.

    Take in a binary string of iob2 data and output a dataframe
    with 'sentence' and 'tags' columns for NER model training.

    Args:
        binary_string: Binary string representing the IOB data to be processed.

    Returns:
        Dataframe with columns 'sentence' and 'tags'.


    """
    # Decode the binary string
    iob_data = binary_string.decode('utf-8')

    # Create dataframe with IOB data separated into sentences
    base_df = pd.DataFrame(data=iob_data.split('\n\n'), columns=['sentence_iob_tokens'])

    # Separate the iob chunks into lists of tuples containing (Word, Tag)
    iob_tokenized_sentences = base_df.apply(lambda row: row.sentence_iob_tokens.split('\n'), axis=1)
    iob_token_tuple_series = iob_tokenized_sentences.apply(lambda sent: list(map(lambda iob: iob.split('\t'), sent)))

    # Combine the data into sentences and generate the list of corresponding tags
    base_df["sentence"] = iob_token_tuple_series.apply(lambda tuple_list: " ".join([x[0] for x in tuple_list]))

    def process_tags(tup_list):
        try:
            return " ".join([x[1] for x in tup_list])
        except Exception as e:
            return ""

    base_df["tags"] = iob_token_tuple_series.apply(process_tags)
    # base_df["tags"] = iob_token_tuple_series.apply(lambda tuple_list: " ".join([x[1] for x in tuple_list]))

    # Get rid of the 'sentence_iob_tokens' column for the final dataset
    final_df = base_df[["sentence", "tags"]]

    return final_df
Molecular biology data preparation
Once we have converted the data into the final data frame format, we can write out the file and upload to Predibase! We can use the dataset previewer in the data view to take a look at the dataset contents:
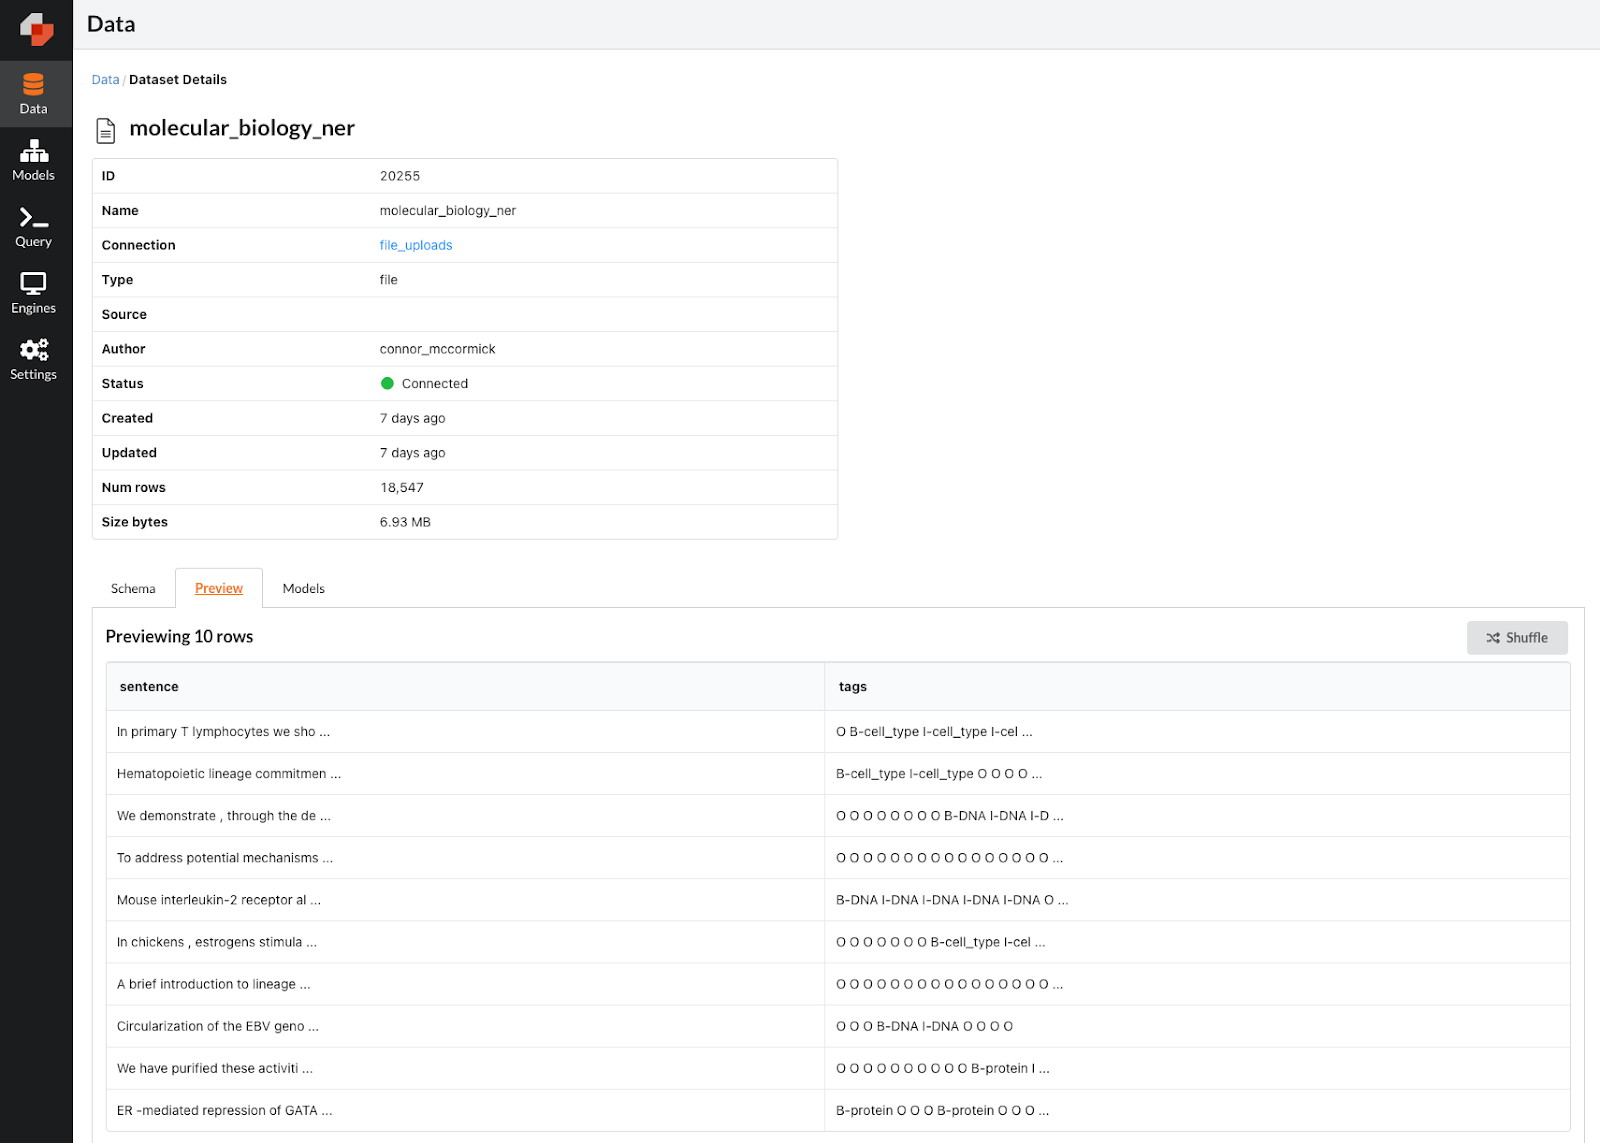
Dataset viewer screenshot for our biological data set.
As you can see, we have a sentence and a corresponding sequence of tags. Each tag indicates the entity name for the sentence token in the corresponding position. For instance, if the 2nd tag is “B-cell_type”, this means that the second word in the sentence is the first word (or beginning) of a multi-word cell type entity. In each row, the number of tags is equal to the number of words/tokens in the sentence, so there will be one tag for every word in the sentence. What we want to do is build a machine learning model that can predict the correct sequence of tags given any input sentence with molecular biology content.
Building our first NER model in just a few clicks
Now that we have prepared our data, we can start building our NER model. First we need to create a model repository to hold all of our experiments; we can name it Molecular Biology Named Entity Recognition.
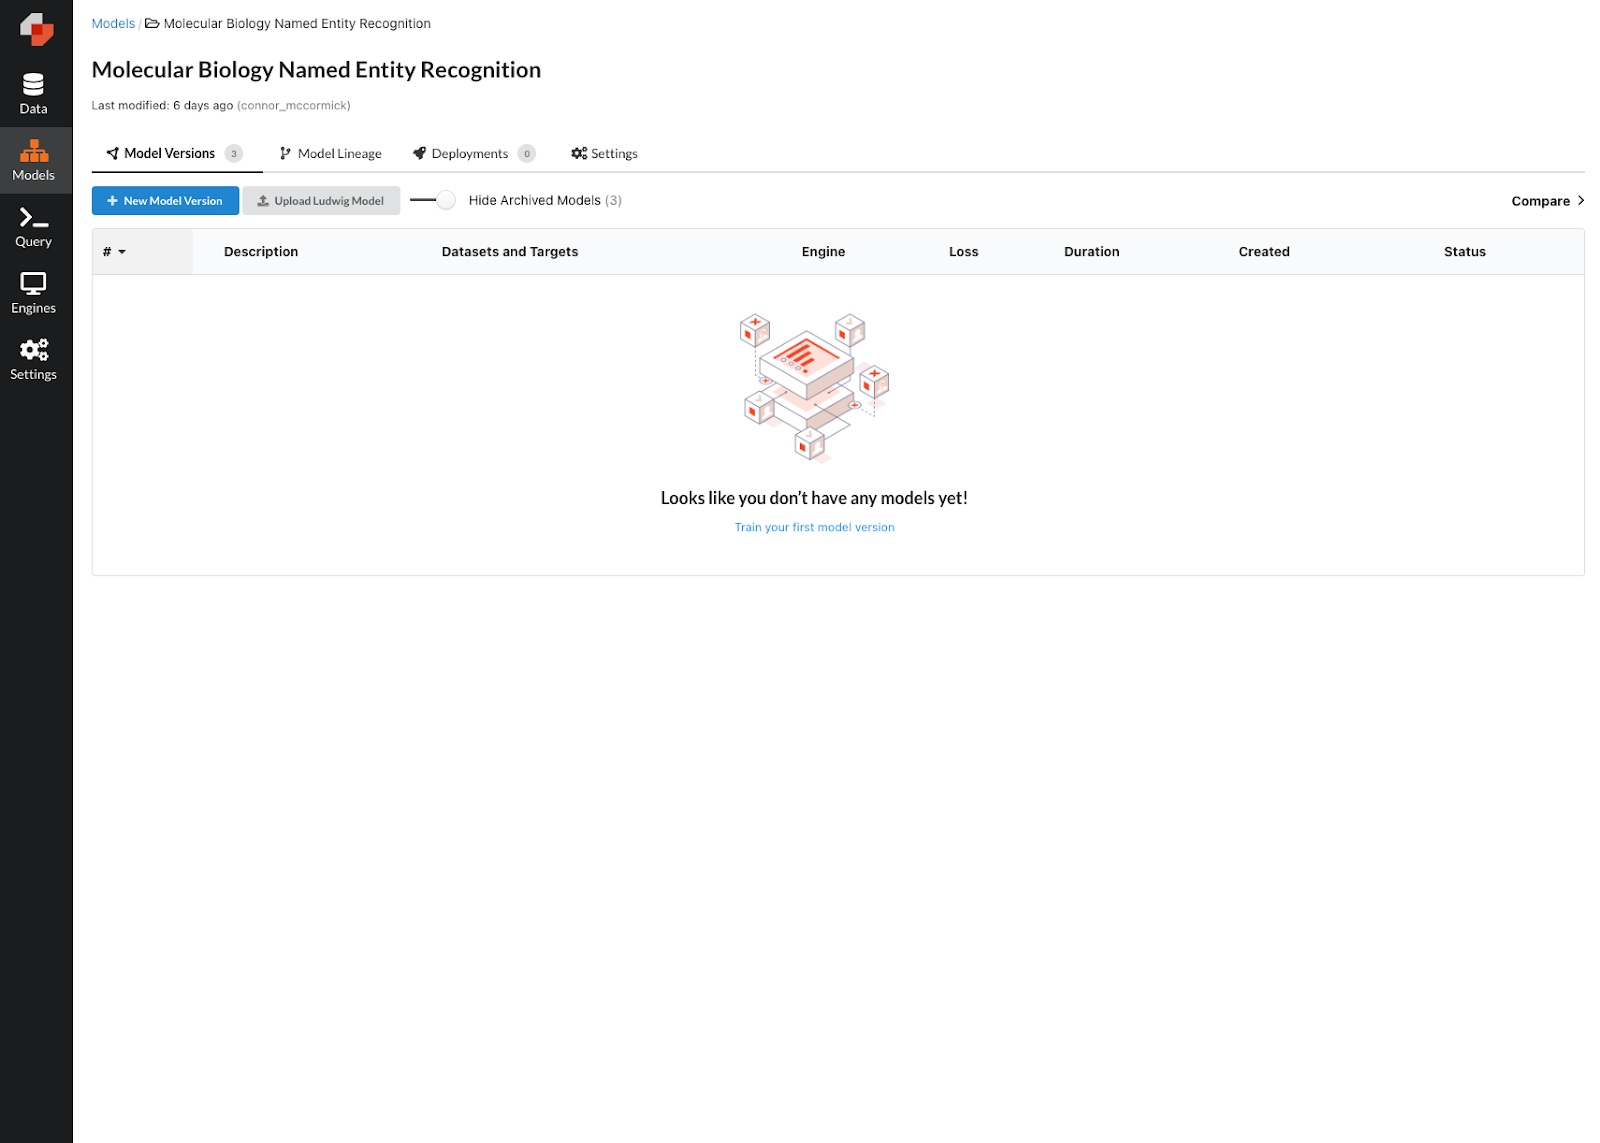
Model repository for our NER model.
With our model repo created, we now are ready to train our first model. By clicking “New Model Version”, we can use the model builder to specify the parameters we want. The first thing we want to do is select our dataset, then select our target value to predict, and lastly make sure that our feature types are correct. As you can see below, we’ve selected the “tags” column as an output feature and set the feature type as a sequence. Predibase automatically infers the type of the sentence column as “text”, so we can leave this column as is. Now we can click the “Next” button to move on to the parameter setting.
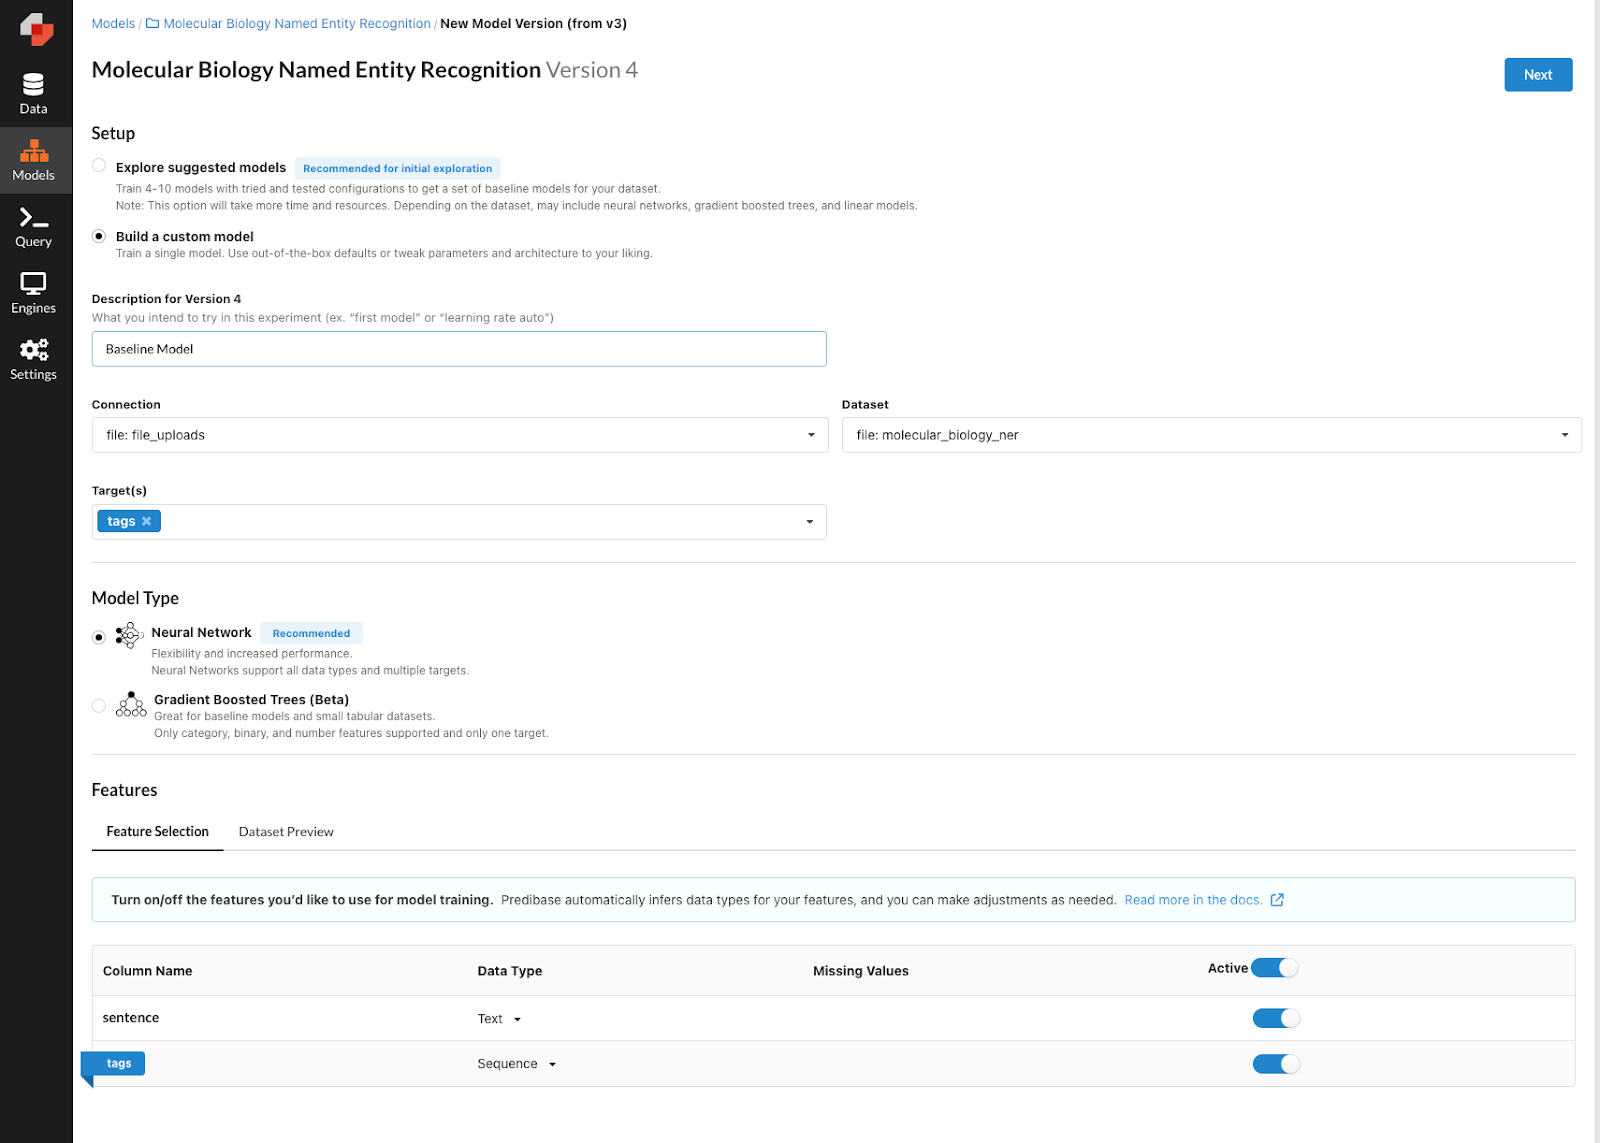
Training our first NER model.
We can use the model builder to select the required parameters for this prediction task which there are a few I’ll go over here:
Encoder Parameters
- type : rnn -> We want to use an RNN in this case since we are using an input sequence of text tokens.
- cell_type : lstm -> Specifically, we chose to use a lstm here because of the enhanced ability to make connections between different members of the input sequences.
- reduce_output : null -> We need to set this parameter to null to ensure that the output vector size matches the length of the tags sequence, allowing there to be a prediction for every token in the input sequence.
Input Feature Preprocessing Parameters
- tokenizer : space -> We chose the space tokenizer because of the way we processed the data. Since the data came in the IOB format, every token comes with a corresponding tag. We joined those tags with a space, so setting the tokenizer to space ensures that the input sequence length will equal the length of tags.
Decoder Parameters
- type : tagger -> We chose the tagger decoder since it is built for this type of problem where we are tagging parts of the input sequence with the designated tags in the output feature.
Global Preprocessing Parameters
- sample_ratio : 0.1 -> We are setting the sample ratio to 0.1 since there is quite a bit of data in this dataset, and training on the entire thing for our first model is probably overkill. If you want to train on the entire dataset however, you can remove this parameter!
Backend Parameters
- trainer.num_workers : 2 -> Similarly, we are capping the epochs at 5 here so the training does not take too long. This unfortunately will prevent our model from converging, so if you want to run this on your own compute and aren't restricted by time, feel free to remove this parameter as well!
Below we have the final configuration that we will be training our model with. Predibase automatically generates the following model configuration based on our selections.
input_features:
  - name: sentence
    type: text
    encoder:
      type: rnn
      cell_type: lstm
      reduce_output: null
    preprocessing:
      tokenizer: space
    column: sentence
output_features:
  - name: tags
    type: sequence
    column: tags
    decoder:
      type: tagger
preprocessing:
  sample_ratio: 0.1
backend:
  trainer:
    num_workers: 2
Configuration for our first NER model
At the core of Predibase is Ludwig, an open-source declarative ML framework that makes building models as easy as writing a few lines of a configuration file. The configuration can be built through Predibase’s UI or written out by hand in any CLI. Now that we’re ready to go, we can click train to start the model training process.
Once our model has finished training, we can evaluate the performance in the model version view. As you can see below, it looks like our first model did decently well with roughly 87% accuracy. Given that we only trained on 10% of the dataset (determined by the sample_ratio parameter), we can probably squeeze out some additional performance on a subsequent model version by increasing the sample ratio and trying out some additional parameters. Predibase makes it easy to quickly iterate on models with a few additional clicks. Let’s select “New Model” in the top right and choose to create a “New Model from Model #1” to train the next version of our NER model.
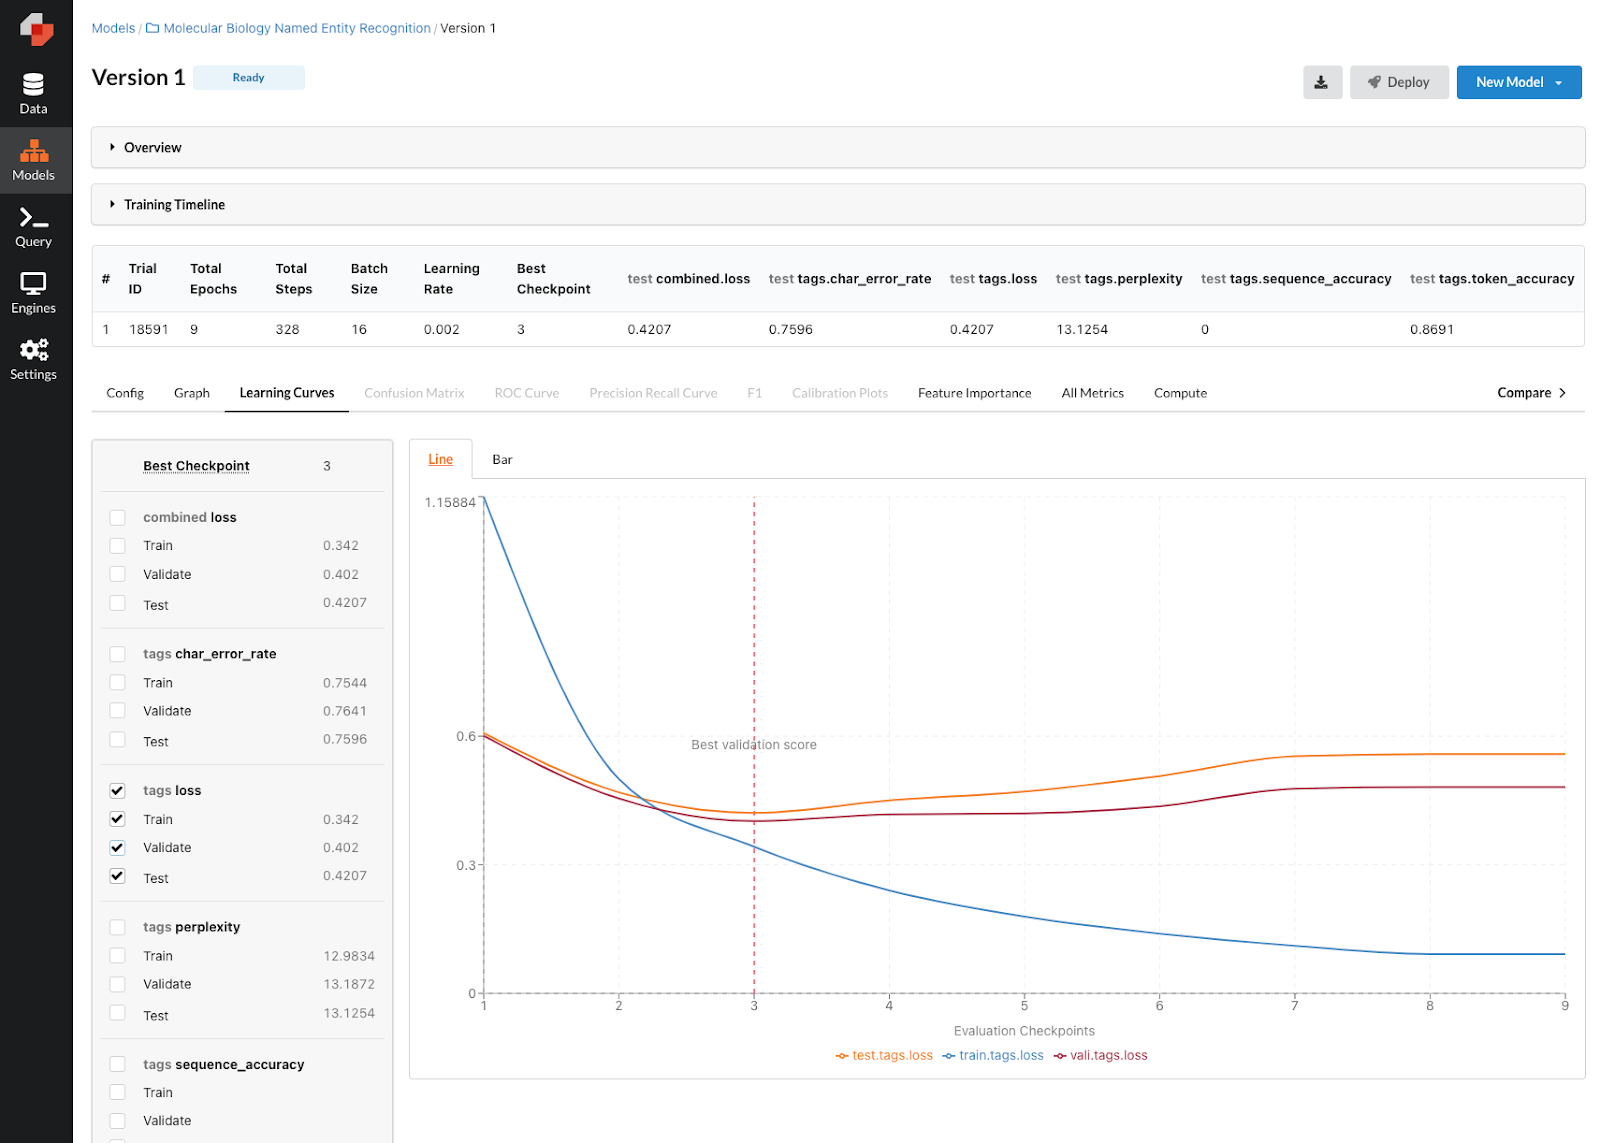
Performance of our first NER Model.
Improving NER model performance through iteration
For this next model, we are going to try a couple things: first and foremost we’re going to increase the sample ratio to 0.5 so we have more data to train on this time around. Secondly, we are going to set “bidirectional” to true in the encoder. Bidirectional rnn’s have been shown to improve performance on some sequence to sequence prediction tasks, so it is likely that setting this parameter could give us a performance improvement. Below you can see the altered config that we’ll train with for our second model version.
input_features:
  - name: sentence
    type: text
    encoder:
      type: rnn
      cell_type: lstm
      bidirectional: true
      reduce_output: null
    preprocessing:
      tokenizer: space
    column: sentence
output_features:
  - name: tags
    type: sequence
    column: tags
    decoder:
      type: tagger
preprocessing:
  sample_ratio: 0.5
backend:
  trainer:
    num_workers: 2
Autogenerated configuration for our second NER model.
It’s worth noting that within the platform, all of these parameters are easily tunable with our model builder forms, making it very easy to set these parameters in a non-code manner.
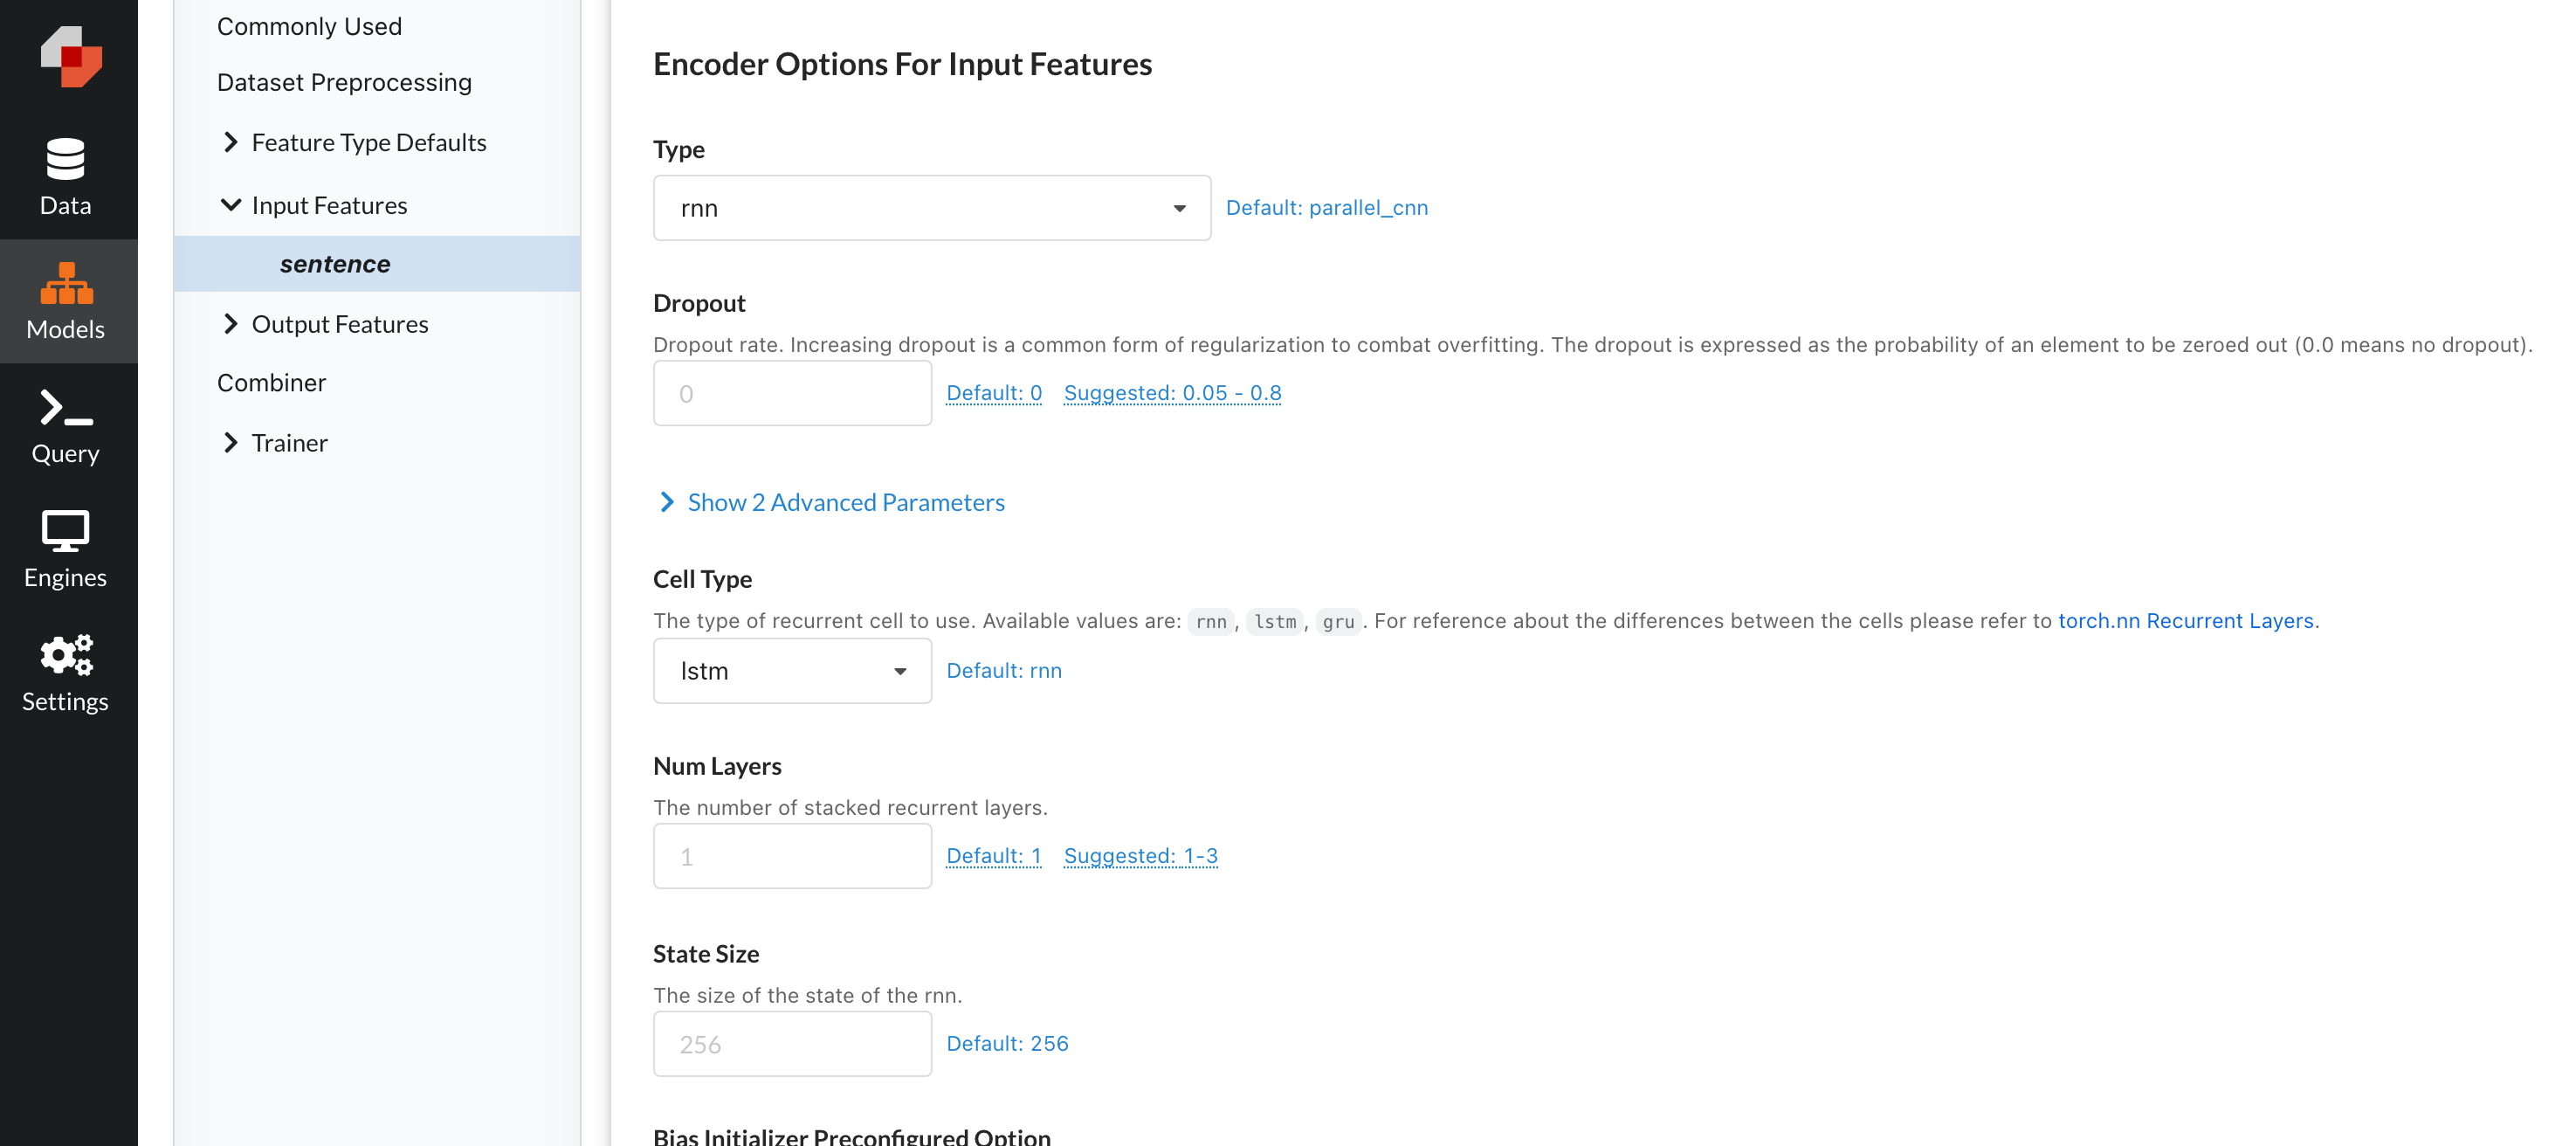
Easily change any model parameter through the Predibase UI.
Taking a look at the model version page, we can see that this model did quite a bit better at roughly 92% accuracy. That’s pretty great so I think it’s time that we take this model to production!
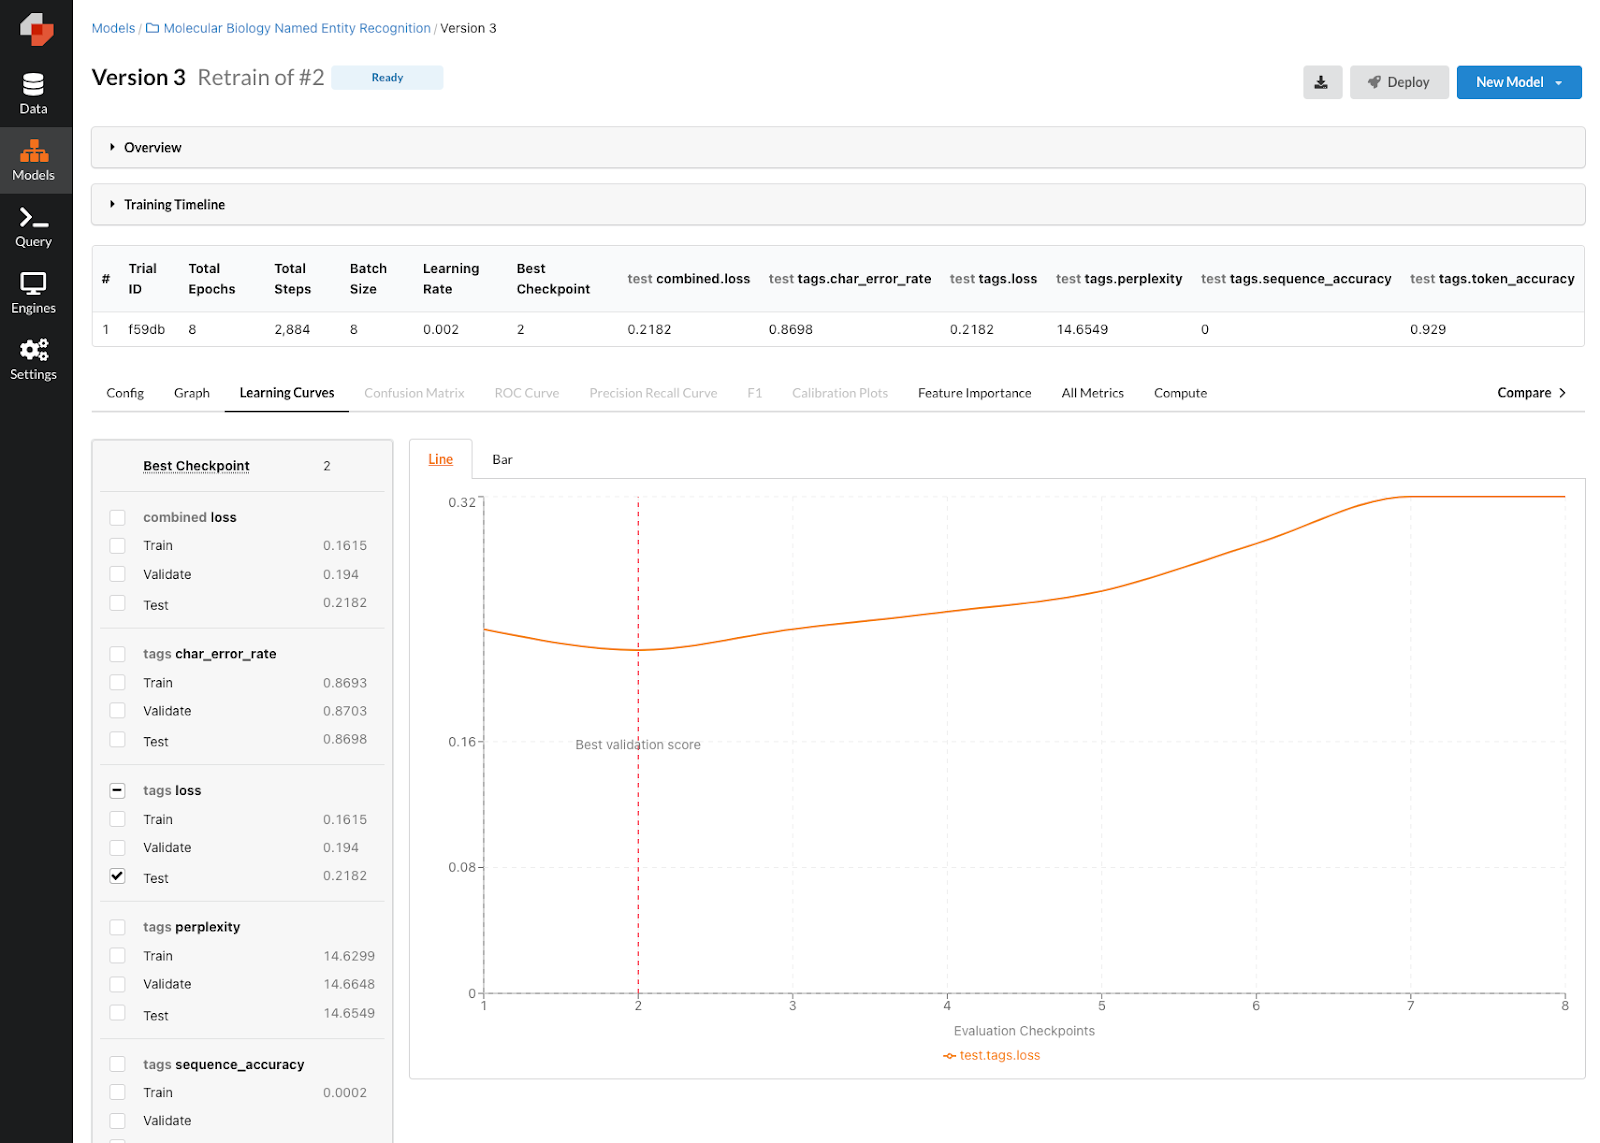
Updated NER model performance with our new configuration.
Operationalizing our NER model
We can operationalize this model in 3 different ways. The first is to use a Predibase managed endpoint created by clicking on the “Deploy” button in the top right. All we have to do here is give the deployment a name and Predibase will do all the work for us to spin up a managed deployment with corresponding endpoint for running inference.
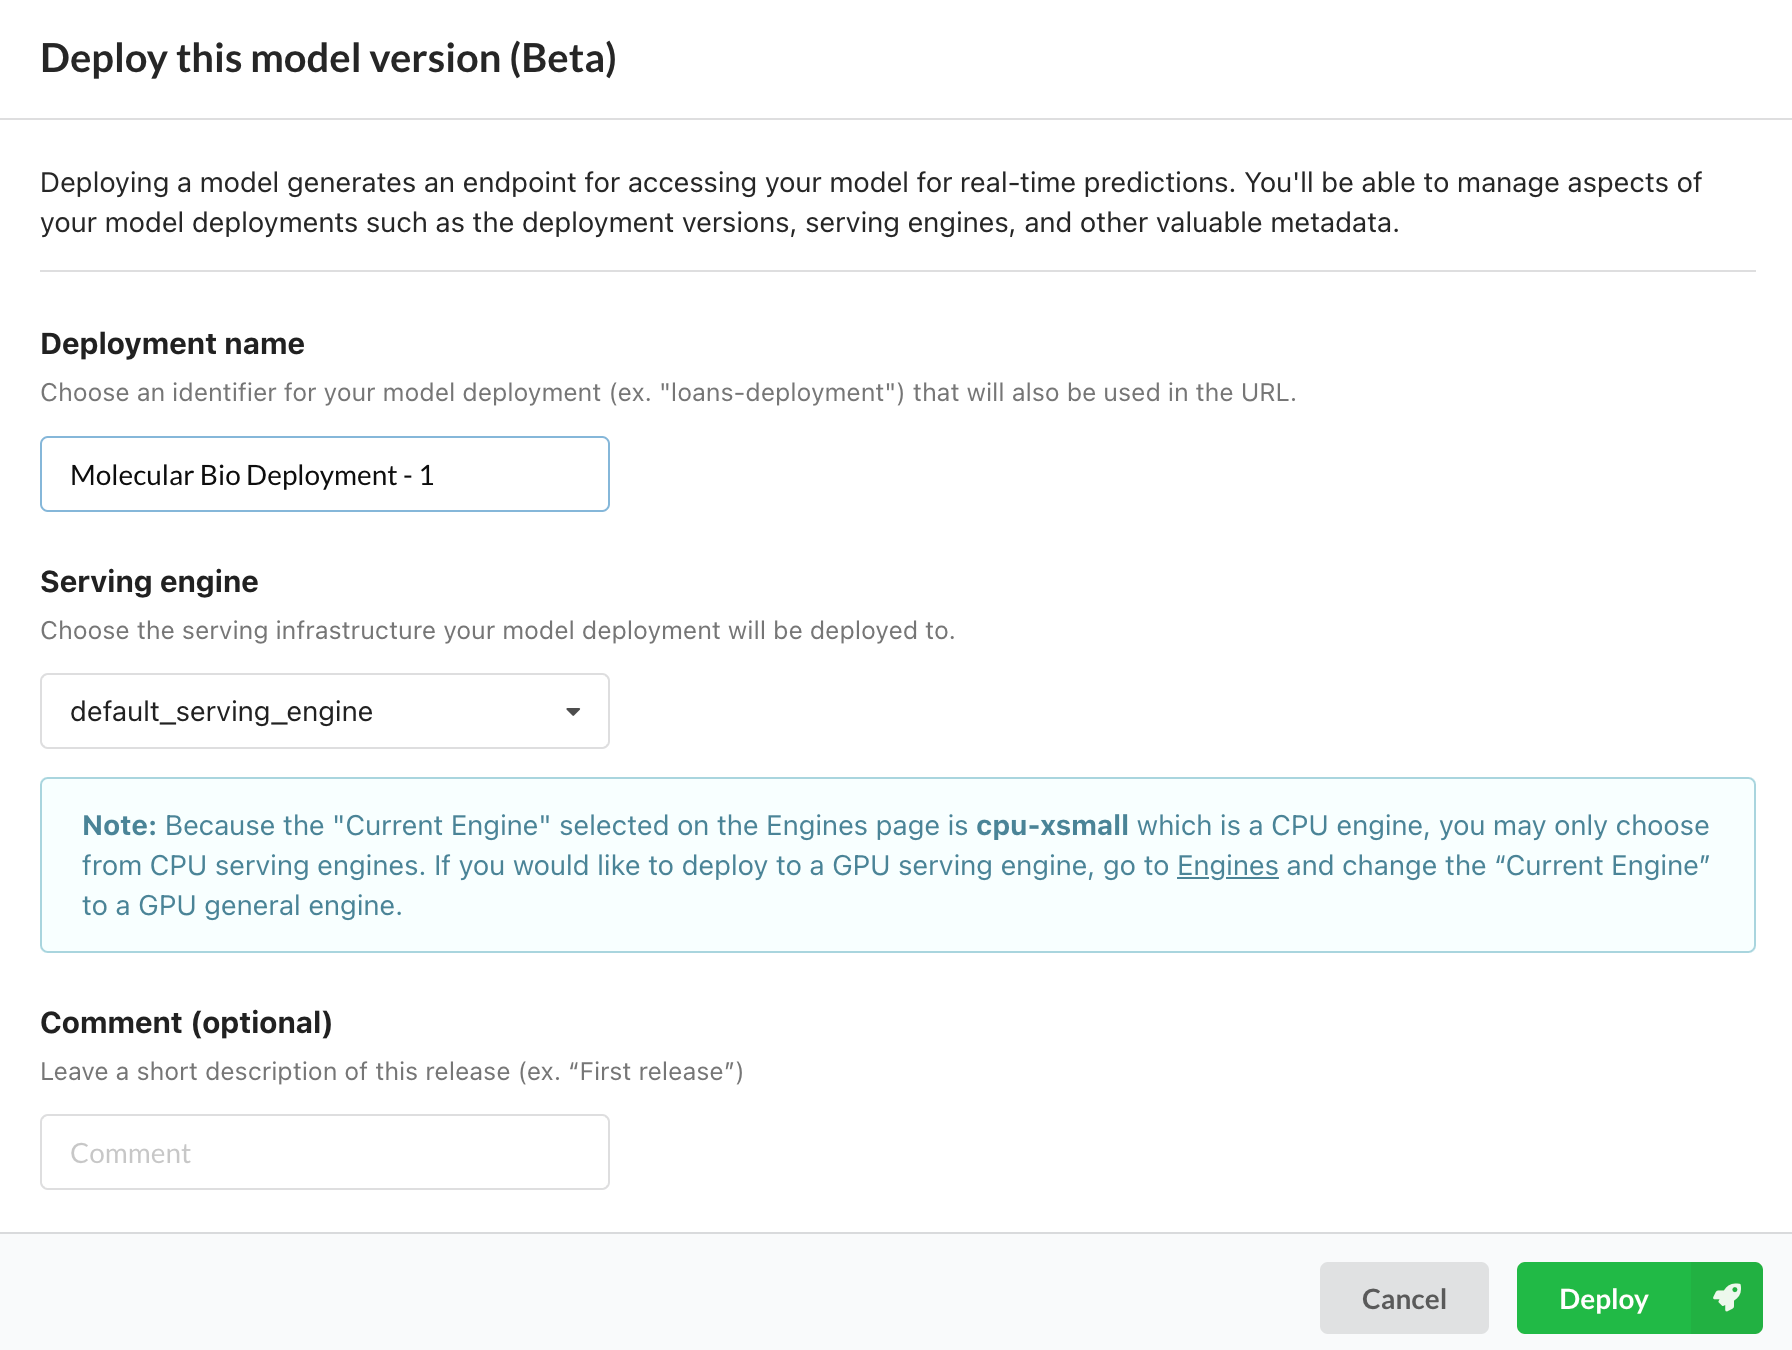
Deploying a model in 2 clicks using Predibase.
Alternatively, we can use the export feature to get the model artifact out of Predibase and integrate it into our own serving infrastructure. Note there are 4 different export format options that can be selected based on your serving needs.
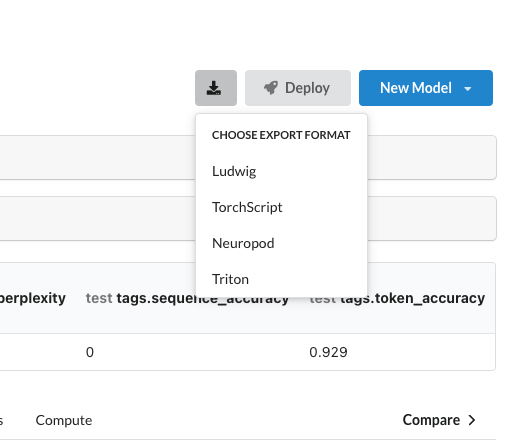
Options for exporting models in Predibase.
Lastly, we can use PQL—the Predictive Query Language which enables you to write predictive queries with SQL-like predicates—to operationalize our model. By using the PREDICT clause and passing in a hypothetical value, we can pass in any sentence that we want to be tagged and PQL will run inference on the input sentence and give us a list of tags we can use. We can also do this in batch format, so if we have a dataset of sentences that we want tagged, we can connect that data and use PQL to generate tags for a batch of sentences all at once. We can also use PQL to schedule these jobs on an on-going basis. How efficient!
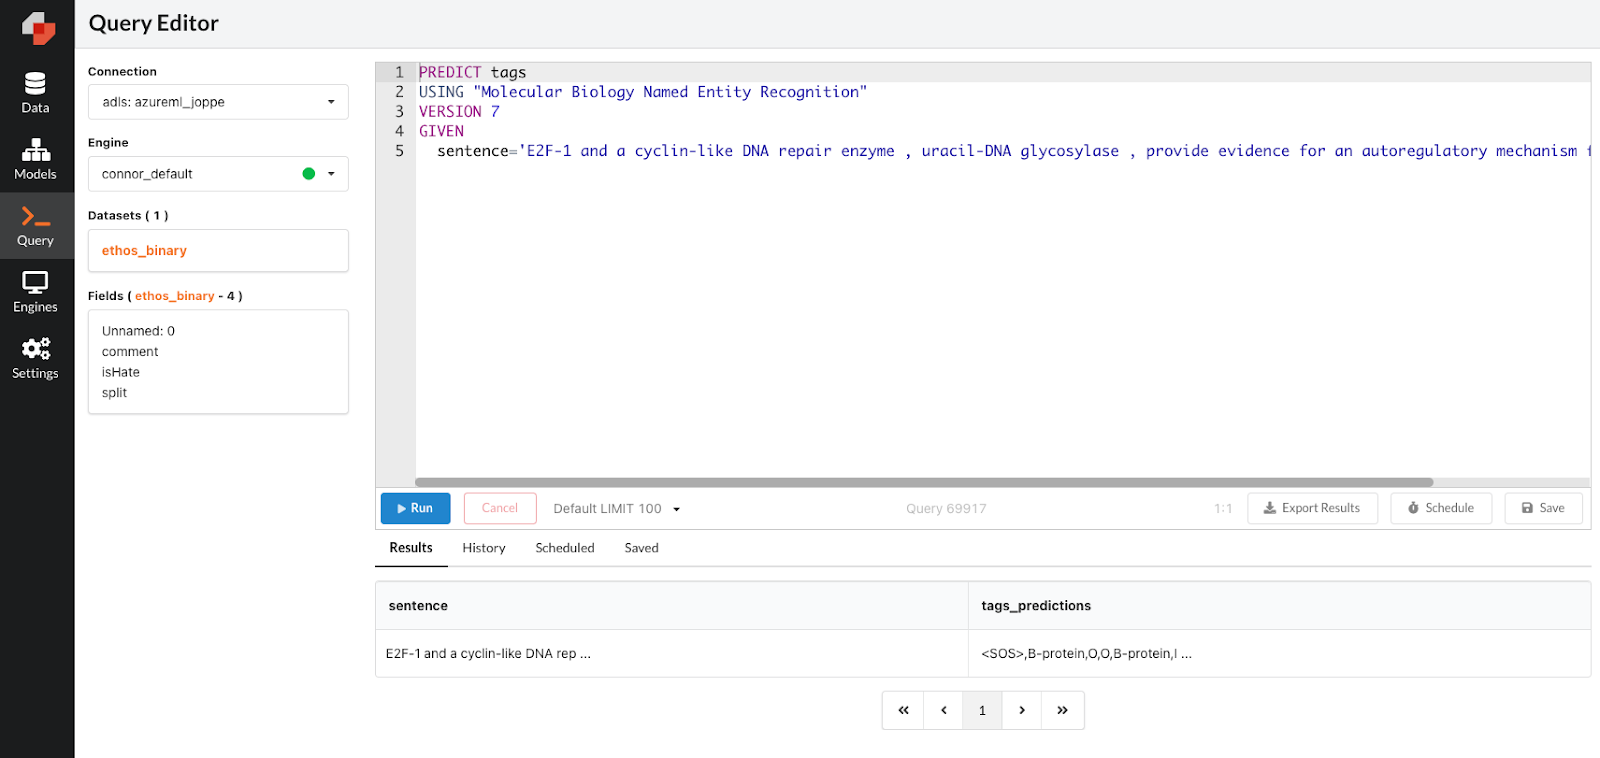
Exploring models and scheduling batch inference with PQL.
Get started building your first NER model with Predibase
In this blog post, we have discussed how to build a Named Entity Recognition model on Molecular Biology Text using Predibase and open-source Ludwig. We have shown how to prepare the data, define the necessary modeling params, analyze, and ultimately operationalize our models.
Predibase is a powerful platform that makes it easy to build and iterate on modeling tasks incredibly quickly. Generally, building a model that can perform sequence to sequence Named Entity Recognition requires hundreds if not thousands of lines of preprocessing, modeling, and ml-ops code. With Predibase however, the complexity along with the time to value is vastly reduced. This is just one of many ways that Predibase can make daunting tasks quick and easy.
If any of this piqued your interest, check out the links below to see how you can use declarative ML to level up your model building workflow:
- Request a personalized demo or free trial of Predibase
- Experiment with our free NER notebook and open-source Ludwig, the declarative ML framework
